Enable SAML with Okta
3 minute read
This tutorial walks through configuring Okta as a SAML identity provider for the Trustgrid Portal using the self-service IdP configuration in Organization Settings.
Prerequisites
- A Trustgrid organization with an authentication domain configured.
- An Okta account with admin access.
Part 1: Configure the IdP in the Trustgrid Portal
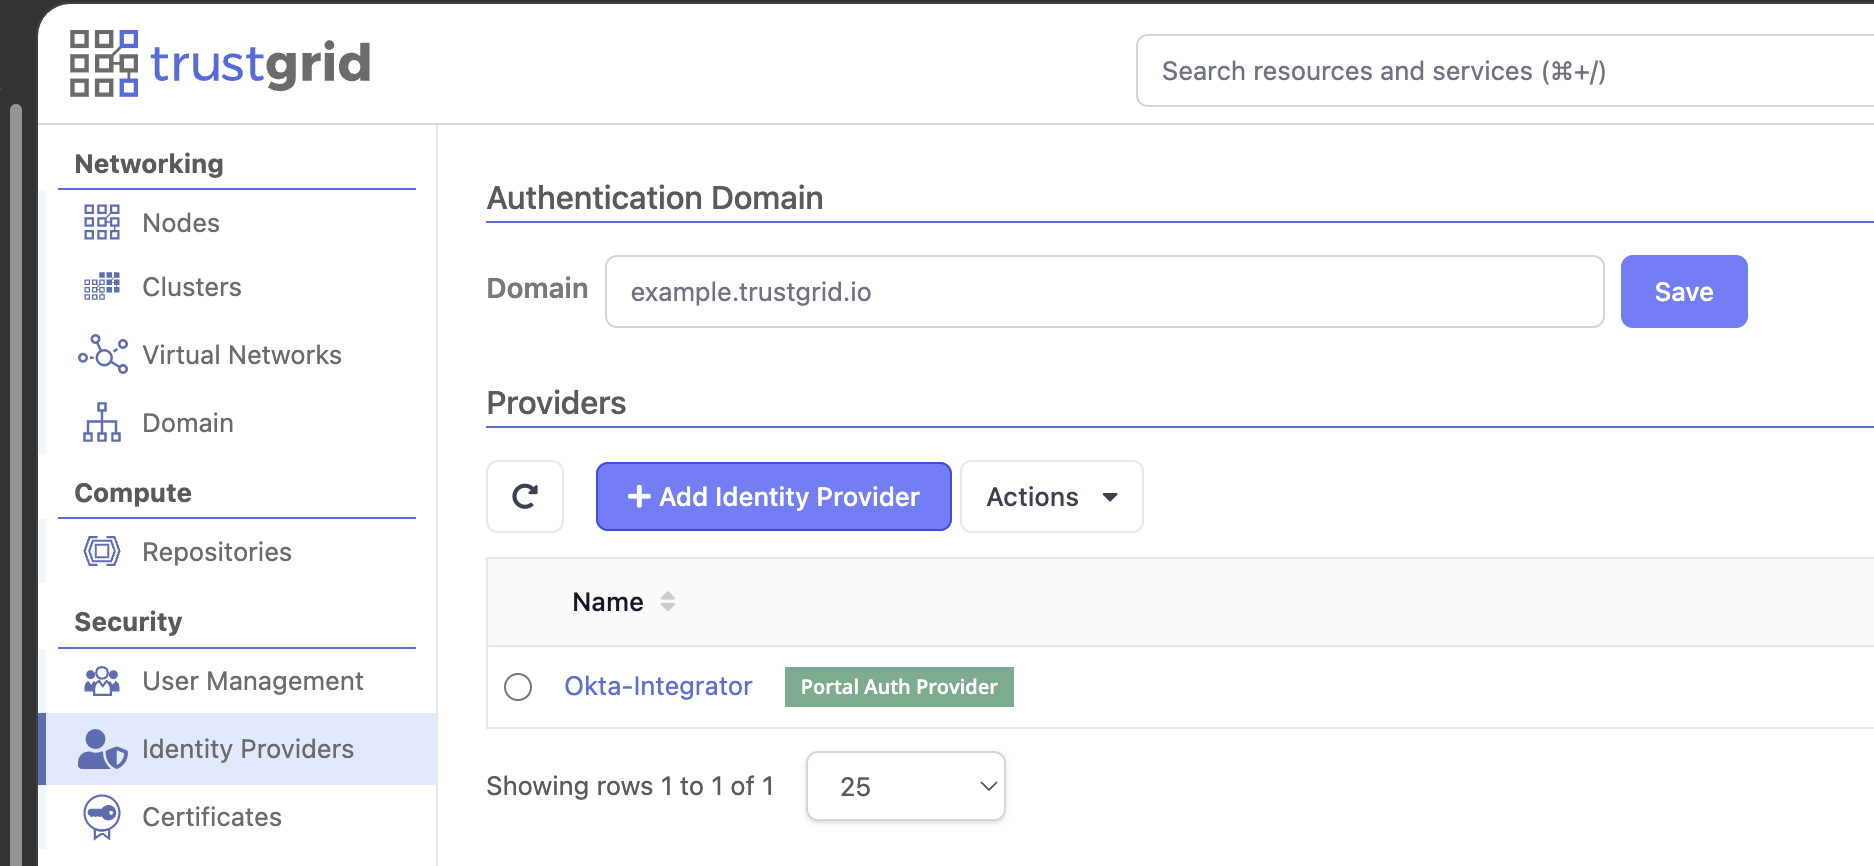
- Navigate to Organization Settings -> Identity Providers.
- Find your Authentication Domain on this page. If you haven’t configured one yet, set it now. It must be in the form
<your-desired-name>.trustgrid.io. Note this value; you will need it when configuring Okta. - Click Add and fill in:
- Type:
SAML - Name: a descriptive name, e.g.
Okta - Use for Portal Auth:
Yes(if using this provider for portal login)
- Type:
- Click Save. This opens the Configuration page. Leave it open; you will return to it in Part 3.
Part 2: Create the SAML App Integration in Okta
- In the Okta admin console, go to Applications -> Applications.
- Click Create App Integration.
- Select SAML 2.0, then click Next.
- On General Settings, enter an app name (e.g.
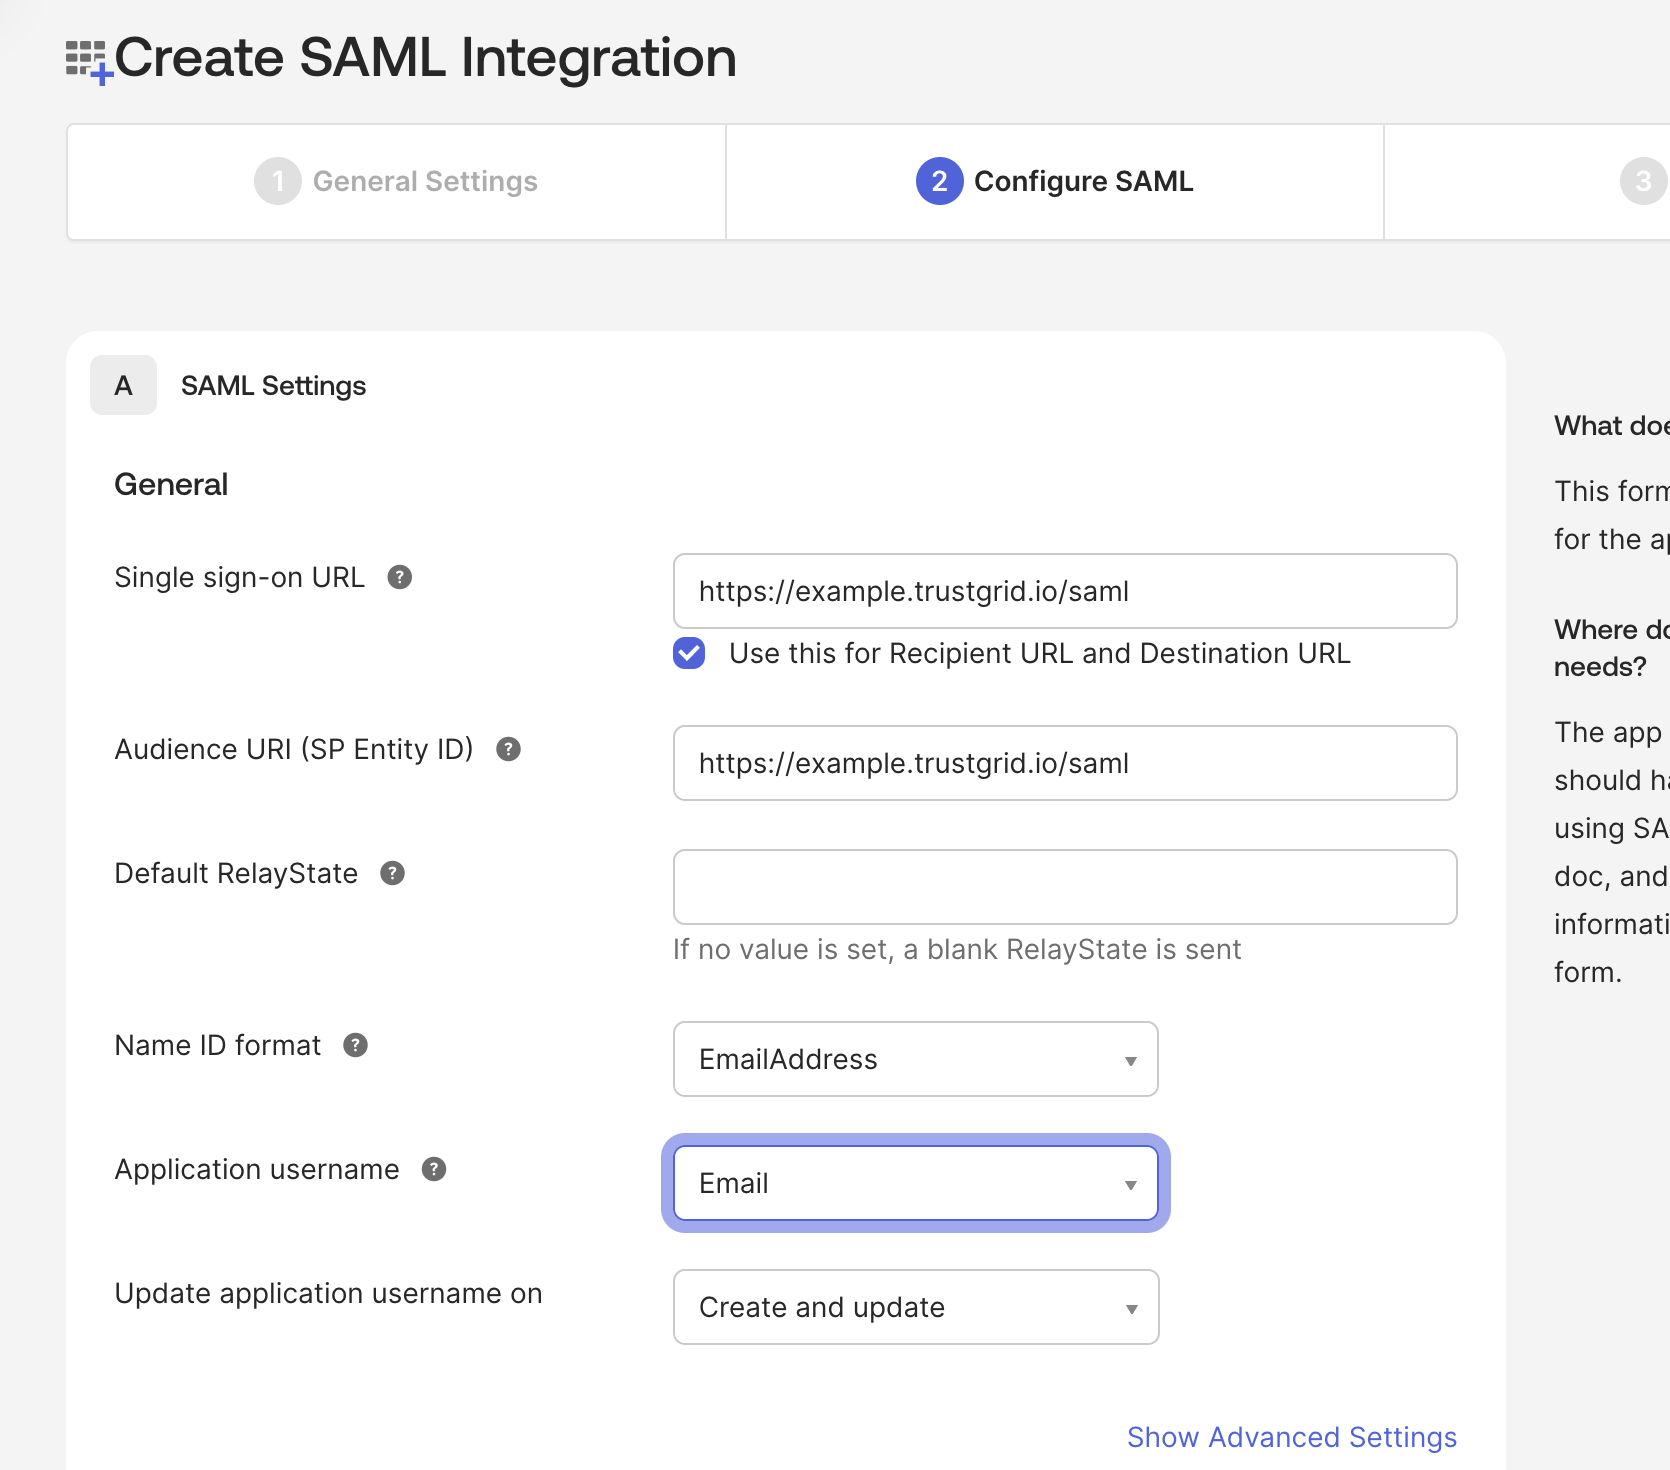
Trustgrid), then click Next. - On Configure SAML, fill in:
- Single sign-on URL: your Authentication Domain from Part 1 with
/samlappended (e.g.https://<subdomain>.trustgrid.io/saml) - Audience URI (SP Entity ID): the same value as the Single sign-on URL
- Name ID format:
EmailAddress - Application username:
Email - Leave all other fields at their defaults.
- Single sign-on URL: your Authentication Domain from Part 1 with
- Click Next.
- On the Feedback step, select This is an internal app that we have created, then click Finish.
Part 3: Import the Okta Metadata into Trustgrid
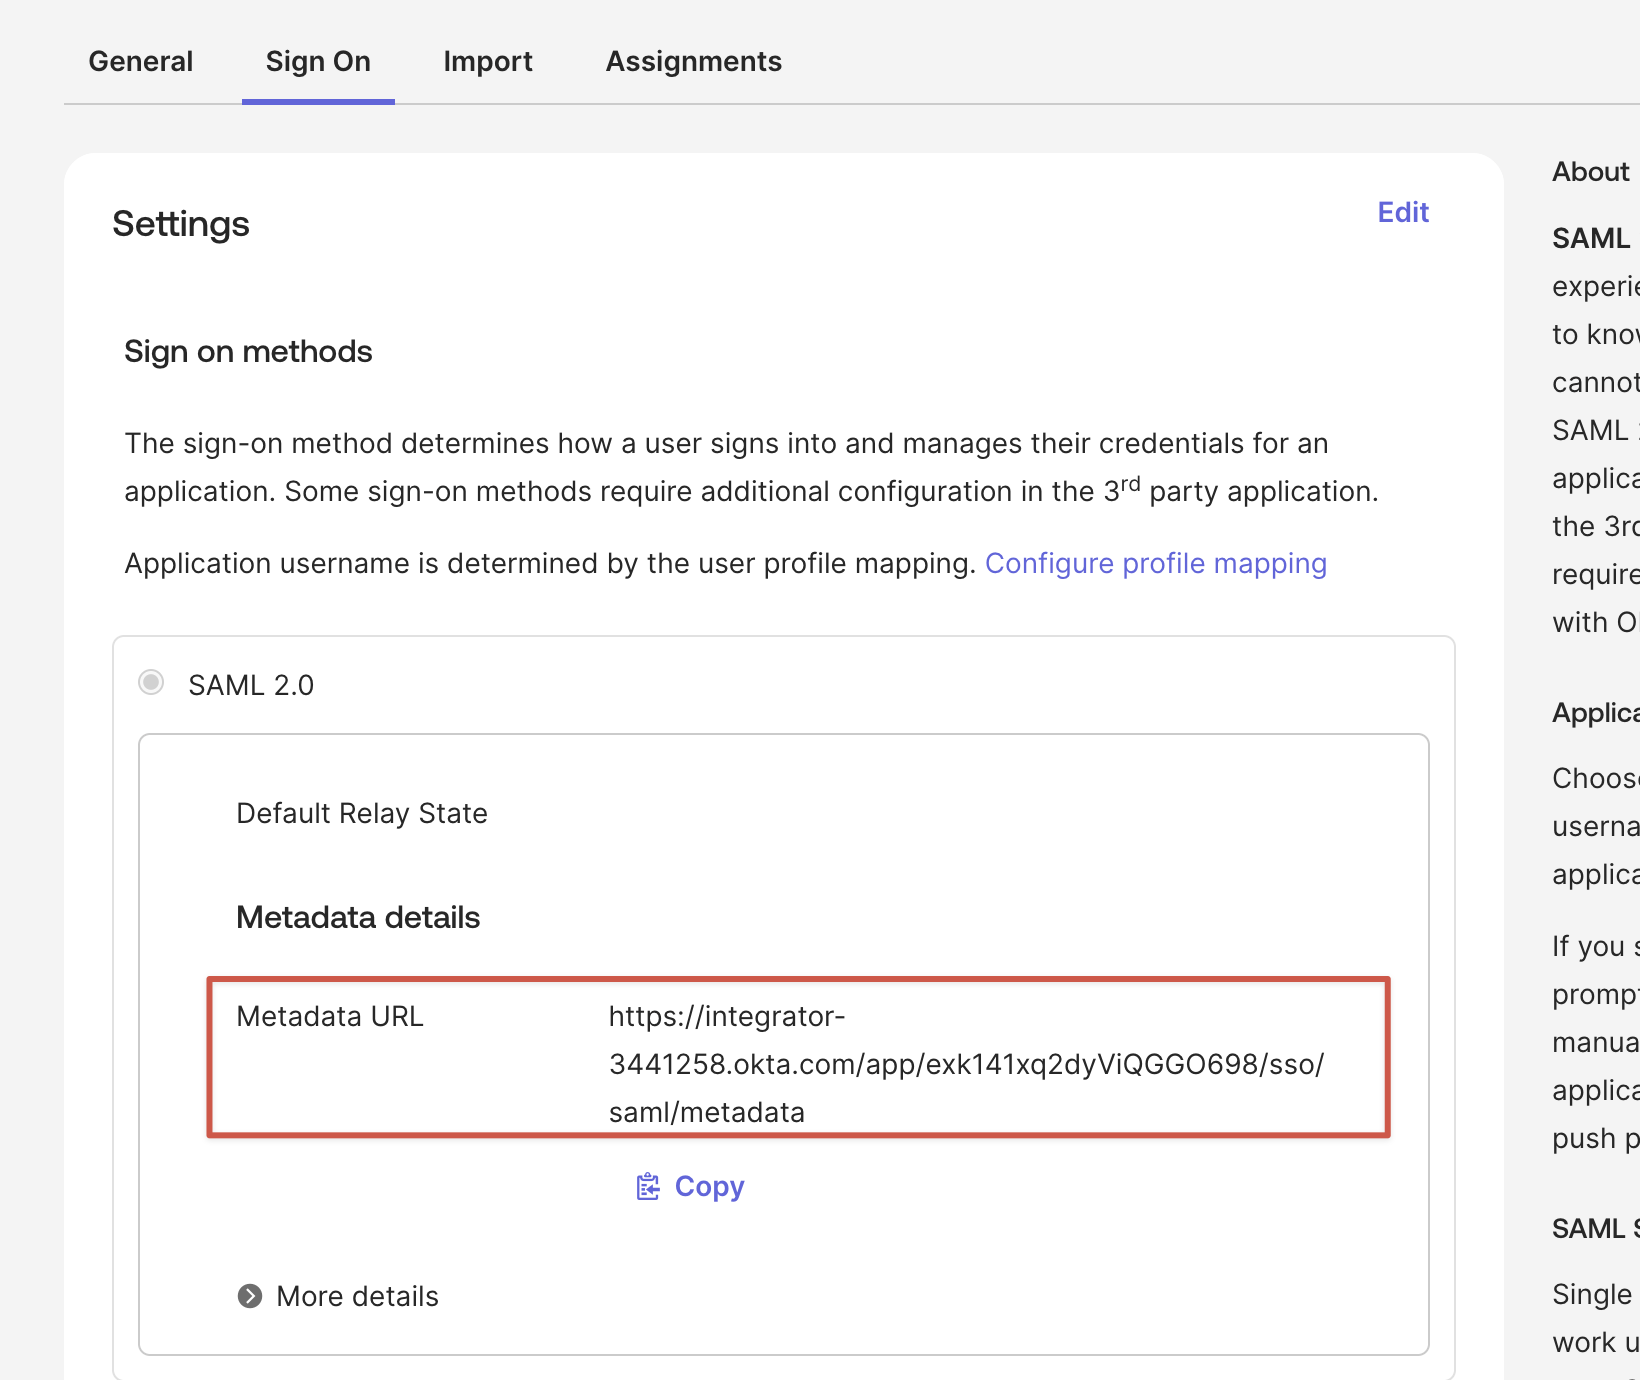
After finishing, you land on the app’s Sign On tab. Under Metadata details, find the Metadata URL.
Option A: XML upload (recommended)
- Click Copy next to the Metadata URL, then open that URL in a new browser tab.
- You will see raw XML. Save the file using File -> Save Page As, and make sure it is saved with a
.xmlextension (not.htmlor.txt). - On the Trustgrid IdP Configuration page, click Choose File and select the saved XML file.
- The Issuer, Login URL, and Identity Provider Signing Certificate fields populate automatically.
- Click Save.
Option B: Manual entry
- Click More details on the Okta Sign On tab.
- Copy the following into the SAML IdP fields in Trustgrid:
- Sign on URL -> Login URL
- Issuer -> Issuer
- Signing Certificate -> Identity Provider Signing Certificate (paste the contents without the
-----BEGIN CERTIFICATE-----and-----END CERTIFICATE-----headers)
- Click Save.
Part 4: Assign Users in Okta
- In the Okta app, go to the Assignments tab.
- Click Assign -> Assign to People for individuals, or Assign to Groups for bulk assignment.
- Assign all users who need Trustgrid portal access.
Part 5: Add Users in the Trustgrid Portal
Follow the Adding Users with Identity Providers process:
- Use Add User, not Invite User.
- The email must exactly match what Okta sends in the SAML assertion.
- Select the Okta IdP when prompted.
Part 6: Test the Login
Open an incognito or private browser window and navigate to your Authentication Domain URL. You should be redirected to Okta, authenticate, and land in the Trustgrid portal. Users can also launch Trustgrid from their Okta app tile.
If SAML fails for any reason, you can fall back to native authentication at https://portal.trustgrid.io using your Trustgrid portal credentials.
Feedback
Was this page helpful?
Glad to hear it! Please tell us how we can improve.
Sorry to hear that. Please tell us how we can improve.